Install the Widget
The WebSpeaker widget gives your visitors access to AI-powered search over your site’s content and, optionally, a live chat with your support team — all without leaving the page they are on. It appears in multiple UI states that let visitors start from search, open the assistant, and continue the conversation naturally.
Widget views on your website
1) Navigation search input
The widget can appear as a compact search field in your top navigation bar, letting visitors ask a question directly from the header.

2) Expanded desktop assistant view
On desktop, the widget can open in an expanded view that combines results and assistant responses in a larger workspace.
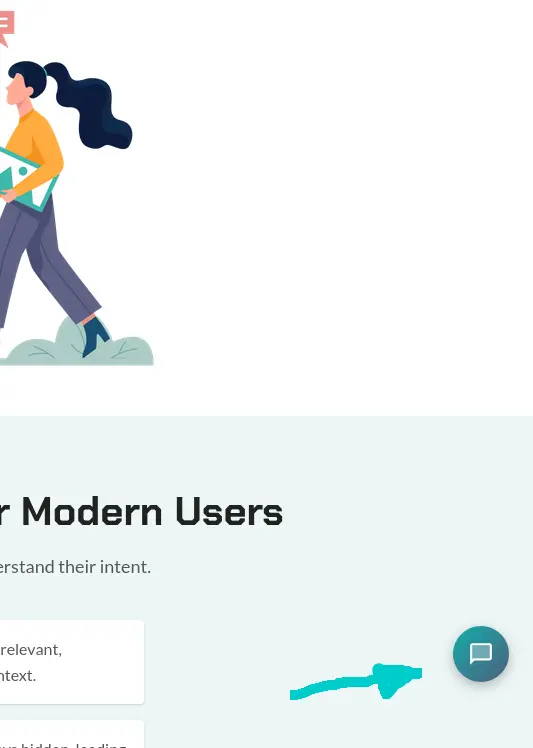
3) Floating launcher bubble
The floating launcher gives quick access to the assistant from any page.
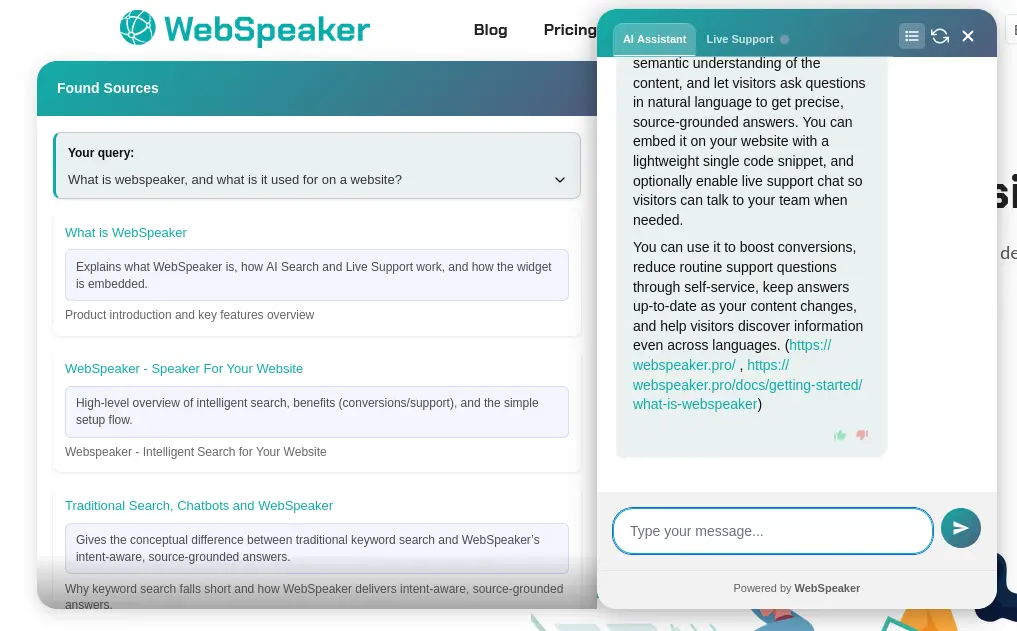
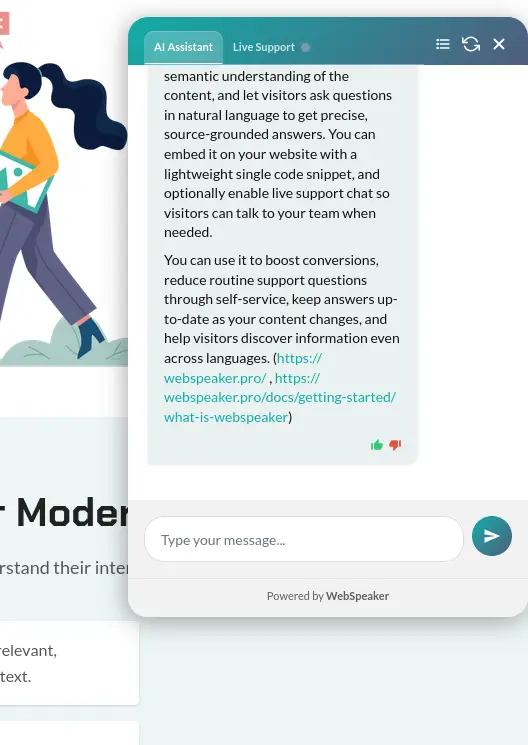
4) Open conversation panel
After opening the launcher, visitors get a full conversation panel with tabs for AI Assistant and Live Support.
Once you have created your project in the WebSpeaker portal, the next step is to embed the widget on your website. The widget is loaded via a small JavaScript snippet that you paste into your site’s HTML. This guide covers how to retrieve the snippet, install it, and handle cookie consent integration.
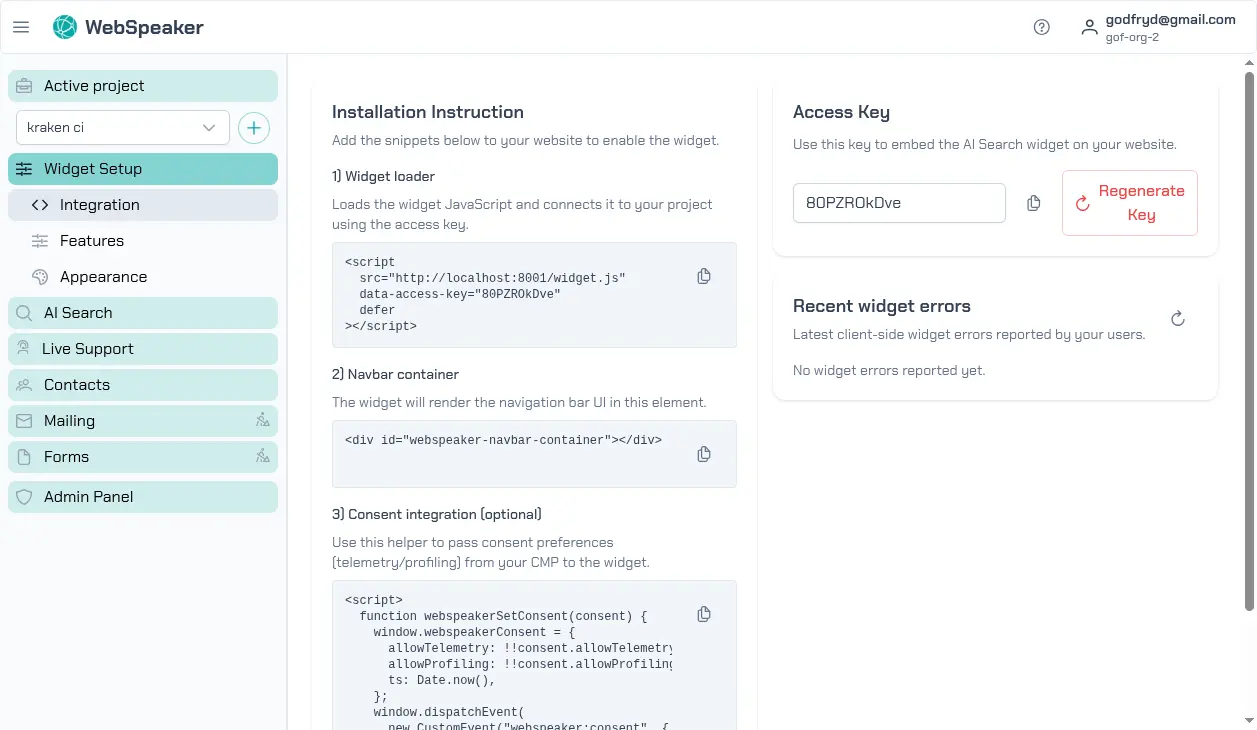
Get the Script Snippet
Log in to portal.webspeaker.pro, navigate to your project, and open the Integration section under Widget Setup. You will find a ready-to-use script snippet that includes your project’s unique access key. The snippet looks similar to this:
<script
  src="https://chatbot.webspeaker.pro/widget-YOUR_ACCESS_KEY.js"
  defer
></script>
Copy the entire snippet exactly as shown. The access key identifies your project and ensures the widget loads the correct configuration, content, and appearance settings.
If you suspect your access key has been compromised or is being used on unauthorized websites, you can regenerate it from the portal. After regenerating, update the script snippet on your website with the new key. The old key will stop working immediately.
Add the Snippet to Your Website
Paste the script snippet into your website’s HTML, ideally just before
the closing </body> tag. Placing it at the end of the body ensures
that the widget loads after your page content, avoiding any impact on
your site’s initial rendering performance. The defer attribute loads
the script without blocking HTML parsing.
If your website uses a content management system (CMS) or a static
site generator, look for the option to add custom scripts to the
footer or body section. Most platforms provide a dedicated field for
this purpose. For single-page applications built with frameworks like
React, Angular, or Vue, you can add the snippet to your index.html
file.
Cookie Consent Integration
If your website uses a cookie consent manager, you can integrate it with the WebSpeaker widget. The widget listens for consent events and adjusts its behavior accordingly. When consent has not been granted, contact tracking features are disabled to ensure GDPR compliance. Once a visitor provides consent, the widget activates full functionality including contact identification and tracking.
The widget listens for standard consent events on the page. Consult your cookie consent platform’s documentation for details on how consent events are dispatched, and ensure that the WebSpeaker widget script is included in the appropriate consent category (typically “functionality” or “analytics”).
The snippet in section 3 of the Integration page shows a
webspeakerSetConsent function that you can call to pass consent
preferences to the widget. It accepts two flags:
webspeakerSetConsent({ allowTelemetry: true, allowProfiling: false });allowTelemetry — when enabled, the widget sends error reports to the
WebSpeaker server. Each report includes the current page URL, the
browser user-agent string, and the widget build identifier. This data
helps the WebSpeaker team diagnose integration issues on your site.
When disabled, widget errors are only logged to the browser console and
are not transmitted to the server. Note: setting allowProfiling to
true implicitly enables telemetry as well.
allowProfiling — when enabled, the widget creates a persistent
contact identifier stored in the visitor’s browser (localStorage) and
sends it along with each chat message. In addition to the contact ID,
the following metadata is collected per message: browser language,
user-agent, current page URL, device type (desktop / tablet / mobile),
and screen dimensions (resolution, viewport size, device pixel ratio).
This data is used in the management portal to identify returning
visitors and provide context to support agents. When disabled, chat
messages are sent anonymously without a contact ID or device metadata.
Error Log
The error log in the Integration section of your project settings provides a record of issues encountered by the widget on your website. This includes loading errors, configuration problems, network failures, and other runtime issues. Each entry includes a timestamp, the error type, a description, and the page URL where the error occurred. Regularly checking the error log helps you identify and resolve issues that may be affecting your visitors’ experience.
Verify the Installation
After adding the snippet, open your website in a browser and check that the WebSpeaker widget appears, typically as a floating chat bubble in the configured corner of the page. Click the bubble to open the widget and confirm that it loads correctly. If the widget does not appear, check the browser’s developer console for errors. Common issues include incorrect access keys, domain restrictions blocking the request, or the script snippet being placed incorrectly in the HTML. You can also check the widget error log in the portal under Integration settings for any reported issues.