Create Your Account
Getting started with WebSpeaker requires creating an account, setting up an organization, and creating your first project. This guide walks you through each step so you can begin configuring your AI search and live support widget.
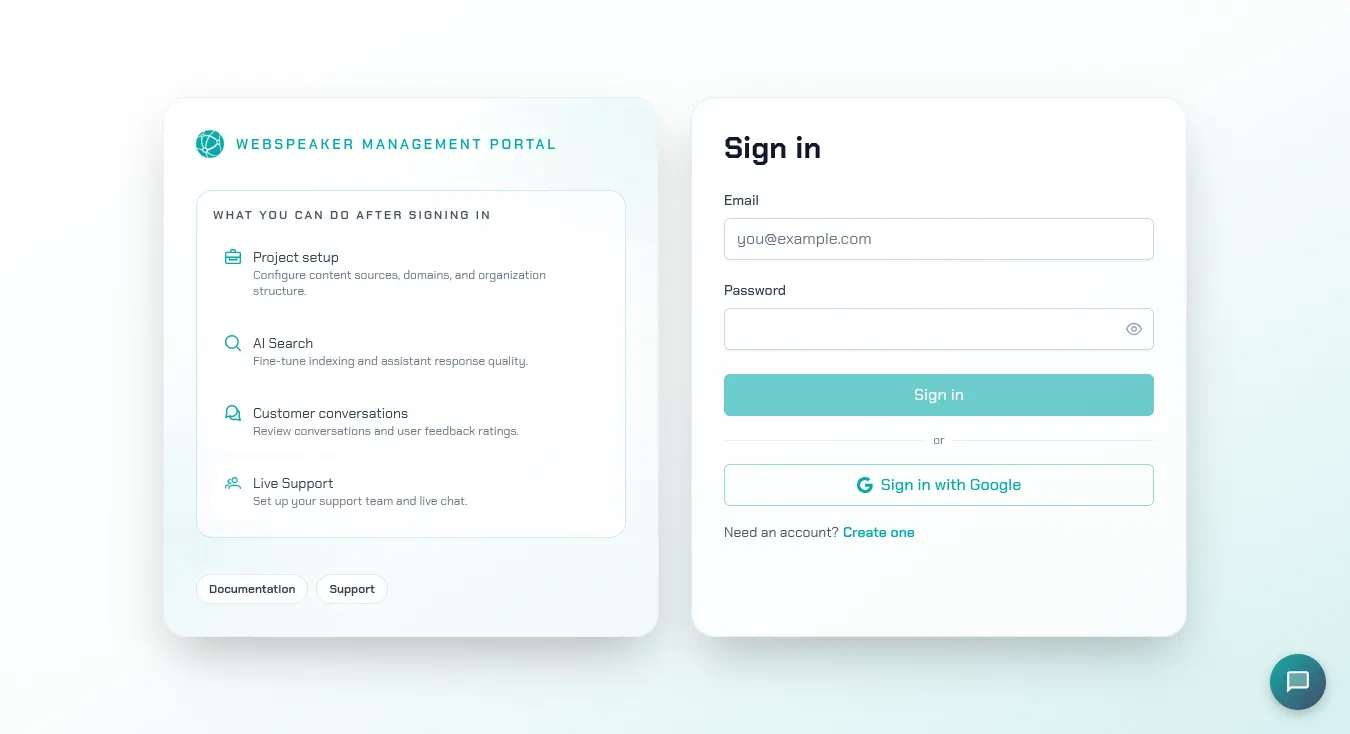
Register at the Portal
Visit portal.webspeaker.pro and click the sign-up button. You can register using your email address and a password. After submitting the registration form, you will receive a verification email. Click the link in the email to confirm your account and gain full access to the management portal.
Dashboard
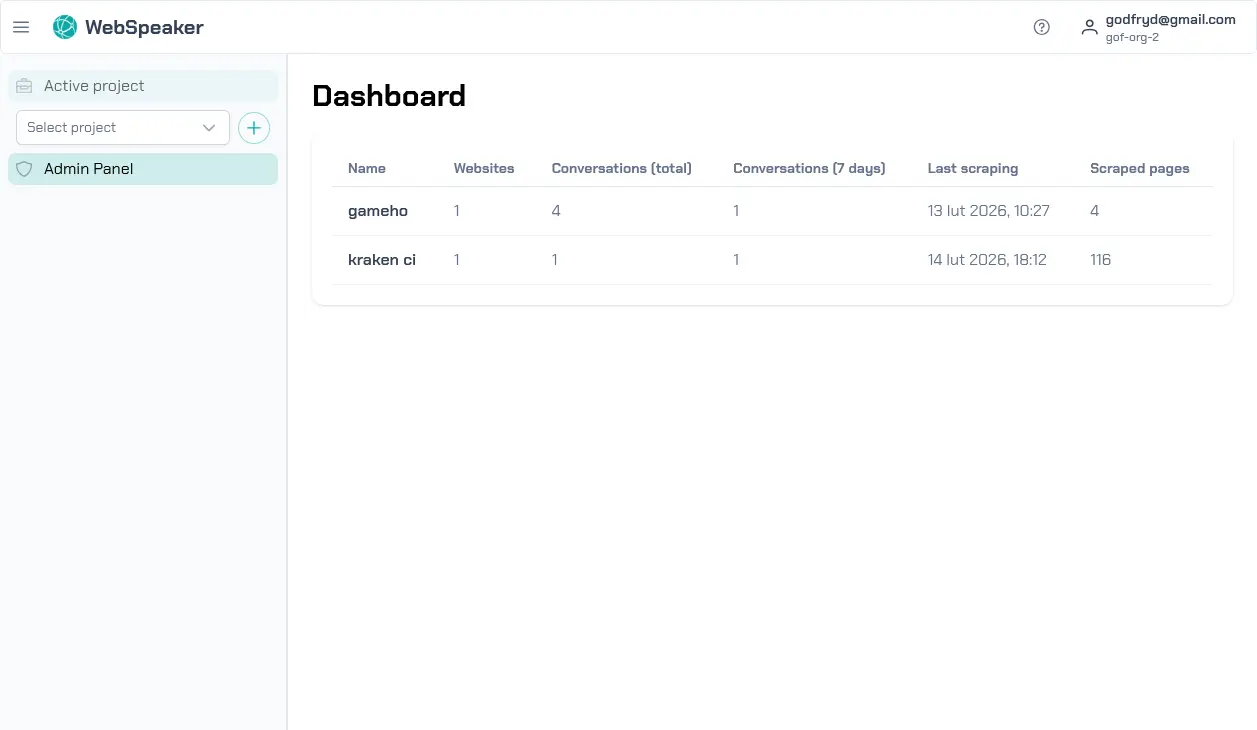
After logging in, you’ll be taken to the dashboard, where you can see a list of your projects along with their statistics. Currently, the dashboard is empty as there are no projects created yet. In the next section, we will guide you through the process of creating your first project.
Create Your First Project
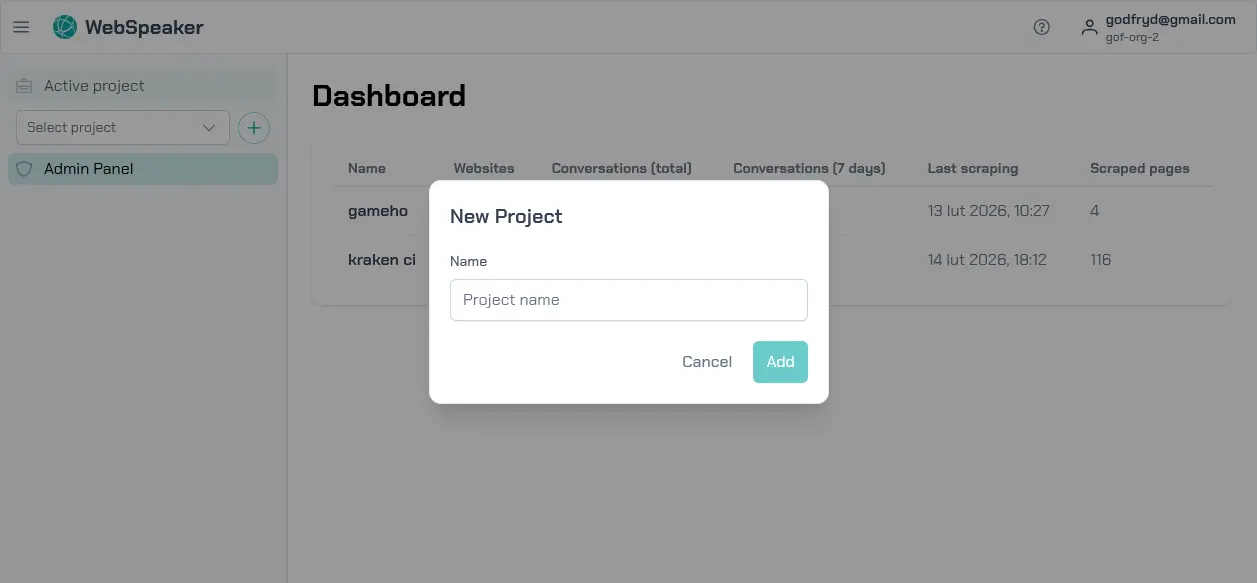
A project represents a single website that you want to add WebSpeaker to. Each project has its own content configuration, widget settings, access keys, and conversation history. Give your project a clear name that identifies the website it belongs to.
To create your first project, click on the plus icon in the sidebar on the right, and then nter a name for your project.
When you create a project, WebSpeaker generates a unique access key and a JavaScript snippet that you will use to embed the widget on your site. You can find these in the project settings under the Integration section.
In the next guide, Quick Start, you’ll learn how to configure scraping and see your widget in action on the demo page. Additionally, below are sections on how to add more organizations and how to add users to your organization.
Organization
An organization is the top-level container that groups your projects and team members together. Choose a descriptive name for your organization, such as your company or team name. You can create multiple organizations later if needed, for example to separate different clients or business units.
Organizations control billing, team membership, and project ownership. As the creator of an organization, you are automatically assigned the owner role, which grants full administrative privileges including the ability to invite and remove members, manage roles, and delete the organization.
You manage your subscription later in Organization -> Billing, where you can review plans, usage, and billing state. See Manage Billing for the full billing guide.
Invite Team Members
To collaborate with colleagues, navigate to the organization settings and use the member invitation feature. Enter the email address of the person you want to invite. They will receive an invitation email with a link to join your organization. You can assign roles to control what each member can do: owners have full control, admins can manage projects and settings, and regular members can access projects and handle support conversations. See the Manage Members guide for more details on roles and permissions.